So one of the handy things you need for wet plate work is a silver nitrate dip tank. A lot of people seem to be using the tanks available from several commercial providers. While I'm sure they offer very professional, good quality products, they seem to be a bit pricey to me for what's basically a flat rectangular plastic tank. For a holder that fits 4×5 you can easily spend somewhere around 80 dollars. So this led me in search of a cheaper DIY option…
My design costs about $5 for the 4×5 variant (less than the dipper alone for some commercial options) and is about an hour of work to make. Here are two pics of my 9×12cm (also fits 4×5″) and 13×18cm (also fits 5×7″) finished results:
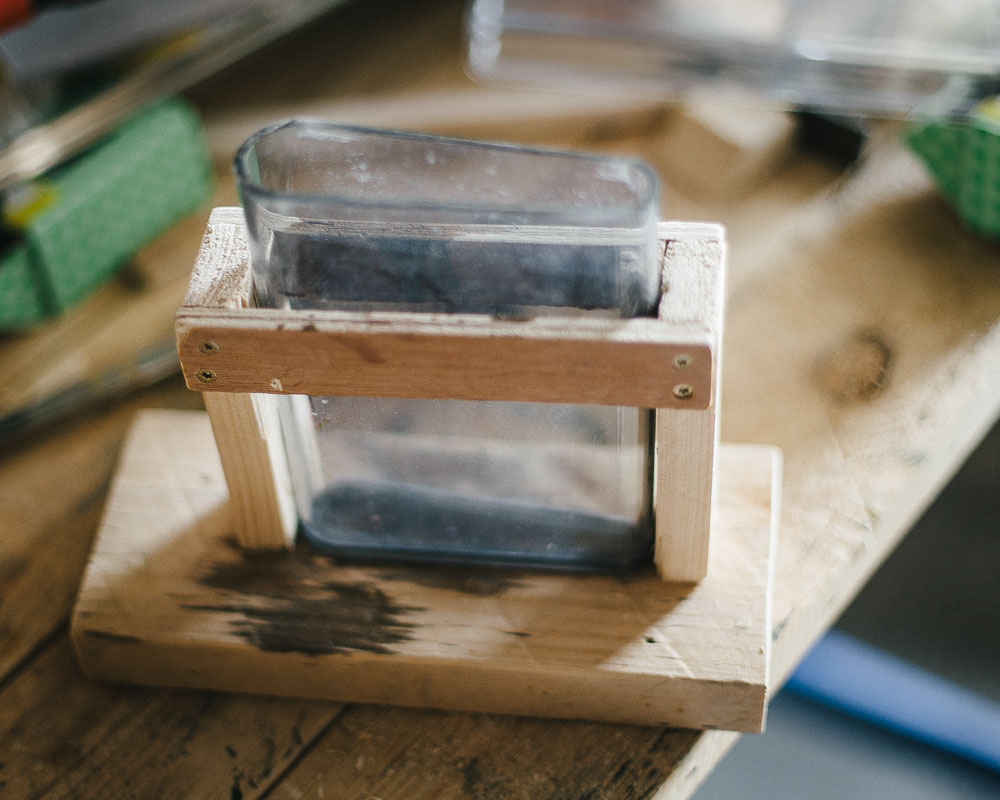
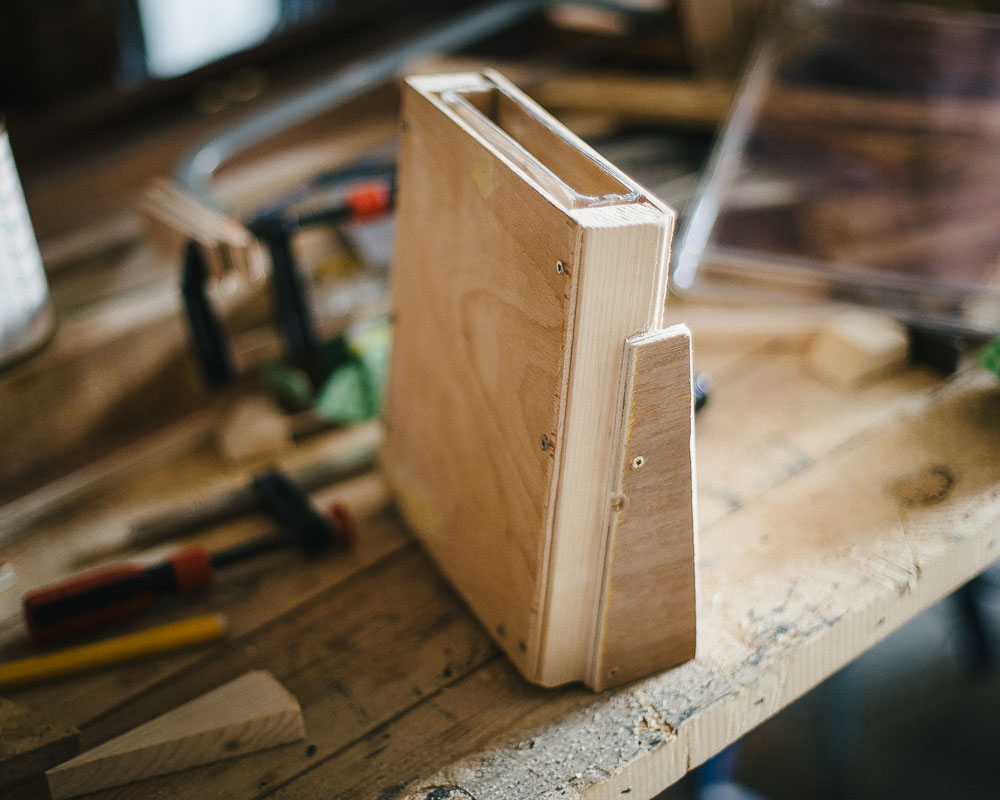
Materials Needed
- A flat water bottle (your choice of size) from your favourite Chinese supplier — $4.50 for the A6 size. They change prices all the time but just search for "memobottle" or "paper bottle" on www.aliexpress.com. Yes, that is a flat rectangular waterproof tank for under $5. They even sell different sizes like real plate holders.
- Wood screws — I used 4 × 4×40mm screws and 8 × 3×20mm screws, but anything you have works — $0.50?
- A largish piece of plastic (I used the lid from a bucket of tile adhesive) — $0.00
- Some scrap pieces of wood — $0.00
- A long flexible piece of plastic or cardboard with a straight edge
Tools Needed
- Standard DIY stuff: tape measure, screwdriver, saw, etc.
- A hacksaw or something else that cuts plastic
- A heat source (I used a heat gun, but candles, spirit lamps, lighters would probably also work)
- A clamp or vise
- Permanent marker
Building the Tank
- Using the flexible plastic/cardboard and marker, mark the cutting line around the perimeter of the bottle. Having a clear guide makes it a lot easier to cut straight using the hacksaw.
- Carefully clamp down the bottle — this makes cutting a lot easier than hand-holding it.
- Using the hacksaw carefully cut the top of the bottle along the marked line. This is probably the most finicky bit of the build. Just take your time…
- File/sand down the cut edge.
That's the tank done. Now the holder:
- Find a relatively heavy, large (say 10 × 15cm) piece of wood. You want this to be heavy to ensure the centre of gravity is low enough to prevent the tank from tipping over easily. After building it I did a few bump tests with the tank filled (with regular water) — with my piece I almost had to kick the tank for it to actually tip over.
- Use the long screws (4×40) to affix two vertical pieces of wood to the base. The screws go through the base from the underside into the vertical pieces so they're invisible when standing upright.
- Use the short screws to affix two horizontal pieces of wood to the vertical bits.
Now the paddle:
- Cut a piece of plastic from the large piece. Make sure the plastic is thick enough or the paddle will be too floppy.
- Clamp down the bottom bit of the paddle between two thin pieces of wood. The thickness of the wood controls the thickness of the paddle grip.
- Heat up the plastic using your heat source and carefully bend it around the wood "mould".
- Cool down, unclamp, and admire your paddle.
- Cut two trapezoid bits of plastic from the back side of the paddle. This makes smaller plates easier to remove as you can grab them by the edges.
- (Optional) Drill holes in the bottom of the paddle to reduce turbulence in the silver bath.
Finishing touches:
- Insert the paddle along with the thickest, largest plate you plan to use (3mm glass in my case) in the tank.
- Fill with water until the level is well below the edge of the tank.
- Remove paddle and plate. Mark the water level as "MAX". This avoids overflowing the tank when you fill it too far with silver when inserting the plate. Note that for aluminium plates there is less volume displaced so you may need to mark several "MAX" levels.
Use
- Carefully wash everything to remove cuttings, factory chemistry, etc. I let mine sit for a few hours with distilled water in it, just in case.
- Insert funnel and fill with silver nitrate until the marked "MAX" level.
- Dip away!
Plate Size / Bottle Size Guide
| Bottle | Plate sizes |
|---|---|
| A6 | 9×12cm, 4×5″ (untested but big enough in theory) |
| A5 | 13×18cm, 5×7″ |
| A4 | 18×24cm (note: just barely doesn't fit 8×10″ being only 7.7″ wide) |
Other Cheap Options (and Why They Didn't Suit Me)
- A regular darkroom tray or baking tray. Silver nitrate won't attack most common plastics so any plastic container should generally be safe. However: it takes up more working space than a vertical tank; you need to switch the lights off while the plate is getting ready; there's more turbulence; and it's easier for dust and debris to contaminate the silver.
- Make your own tank from acrylics or glass. Probably better if you need something bigger (say 8×10). I hesitated because acrylic cut and welded properly still amounts to around 25–30 euros where I live — and it's tricky to get perfectly watertight seams.